Executing Gradle builds on GitHub Actions
| Top engineering teams using GitHub Actions have been able to reduce CI build time by up to 90% by using the Gradle Build Cache. Register here for our Build Cache training session to learn how your team can achieve similar results. |
Building Gradle projects doesn’t stop with the developer’s machine. Continuous Integration (CI) has been a long-established practice for running a build for every single change committed to version control to tighten the feedback loop.
In this guide, we’ll discuss how to configure GitHub Actions for a Gradle project hosted on GitHub.
Introduction
GitHub Actions is a cloud-based CI solution provider built directly into GitHub, making it an excellent choice for projects hosted on GitHub.
Using the setup-gradle GitHub Action makes it simple to integrate any Gradle project into a GitHub Actions workflow.
What you’ll need
-
A text editor
-
A command prompt
-
The Java Development Kit (JDK), version 1.8 or higher
-
A local Gradle installation, to initialize a new Gradle project
-
A GitHub account
Setup a Gradle project on GitHub
If you have an existing Gradle project hosted on GitHub, then you can skip this step and move directly to Configure GitHub Actions.
If not, follow these step to initialize a new Gradle project on GitHub.
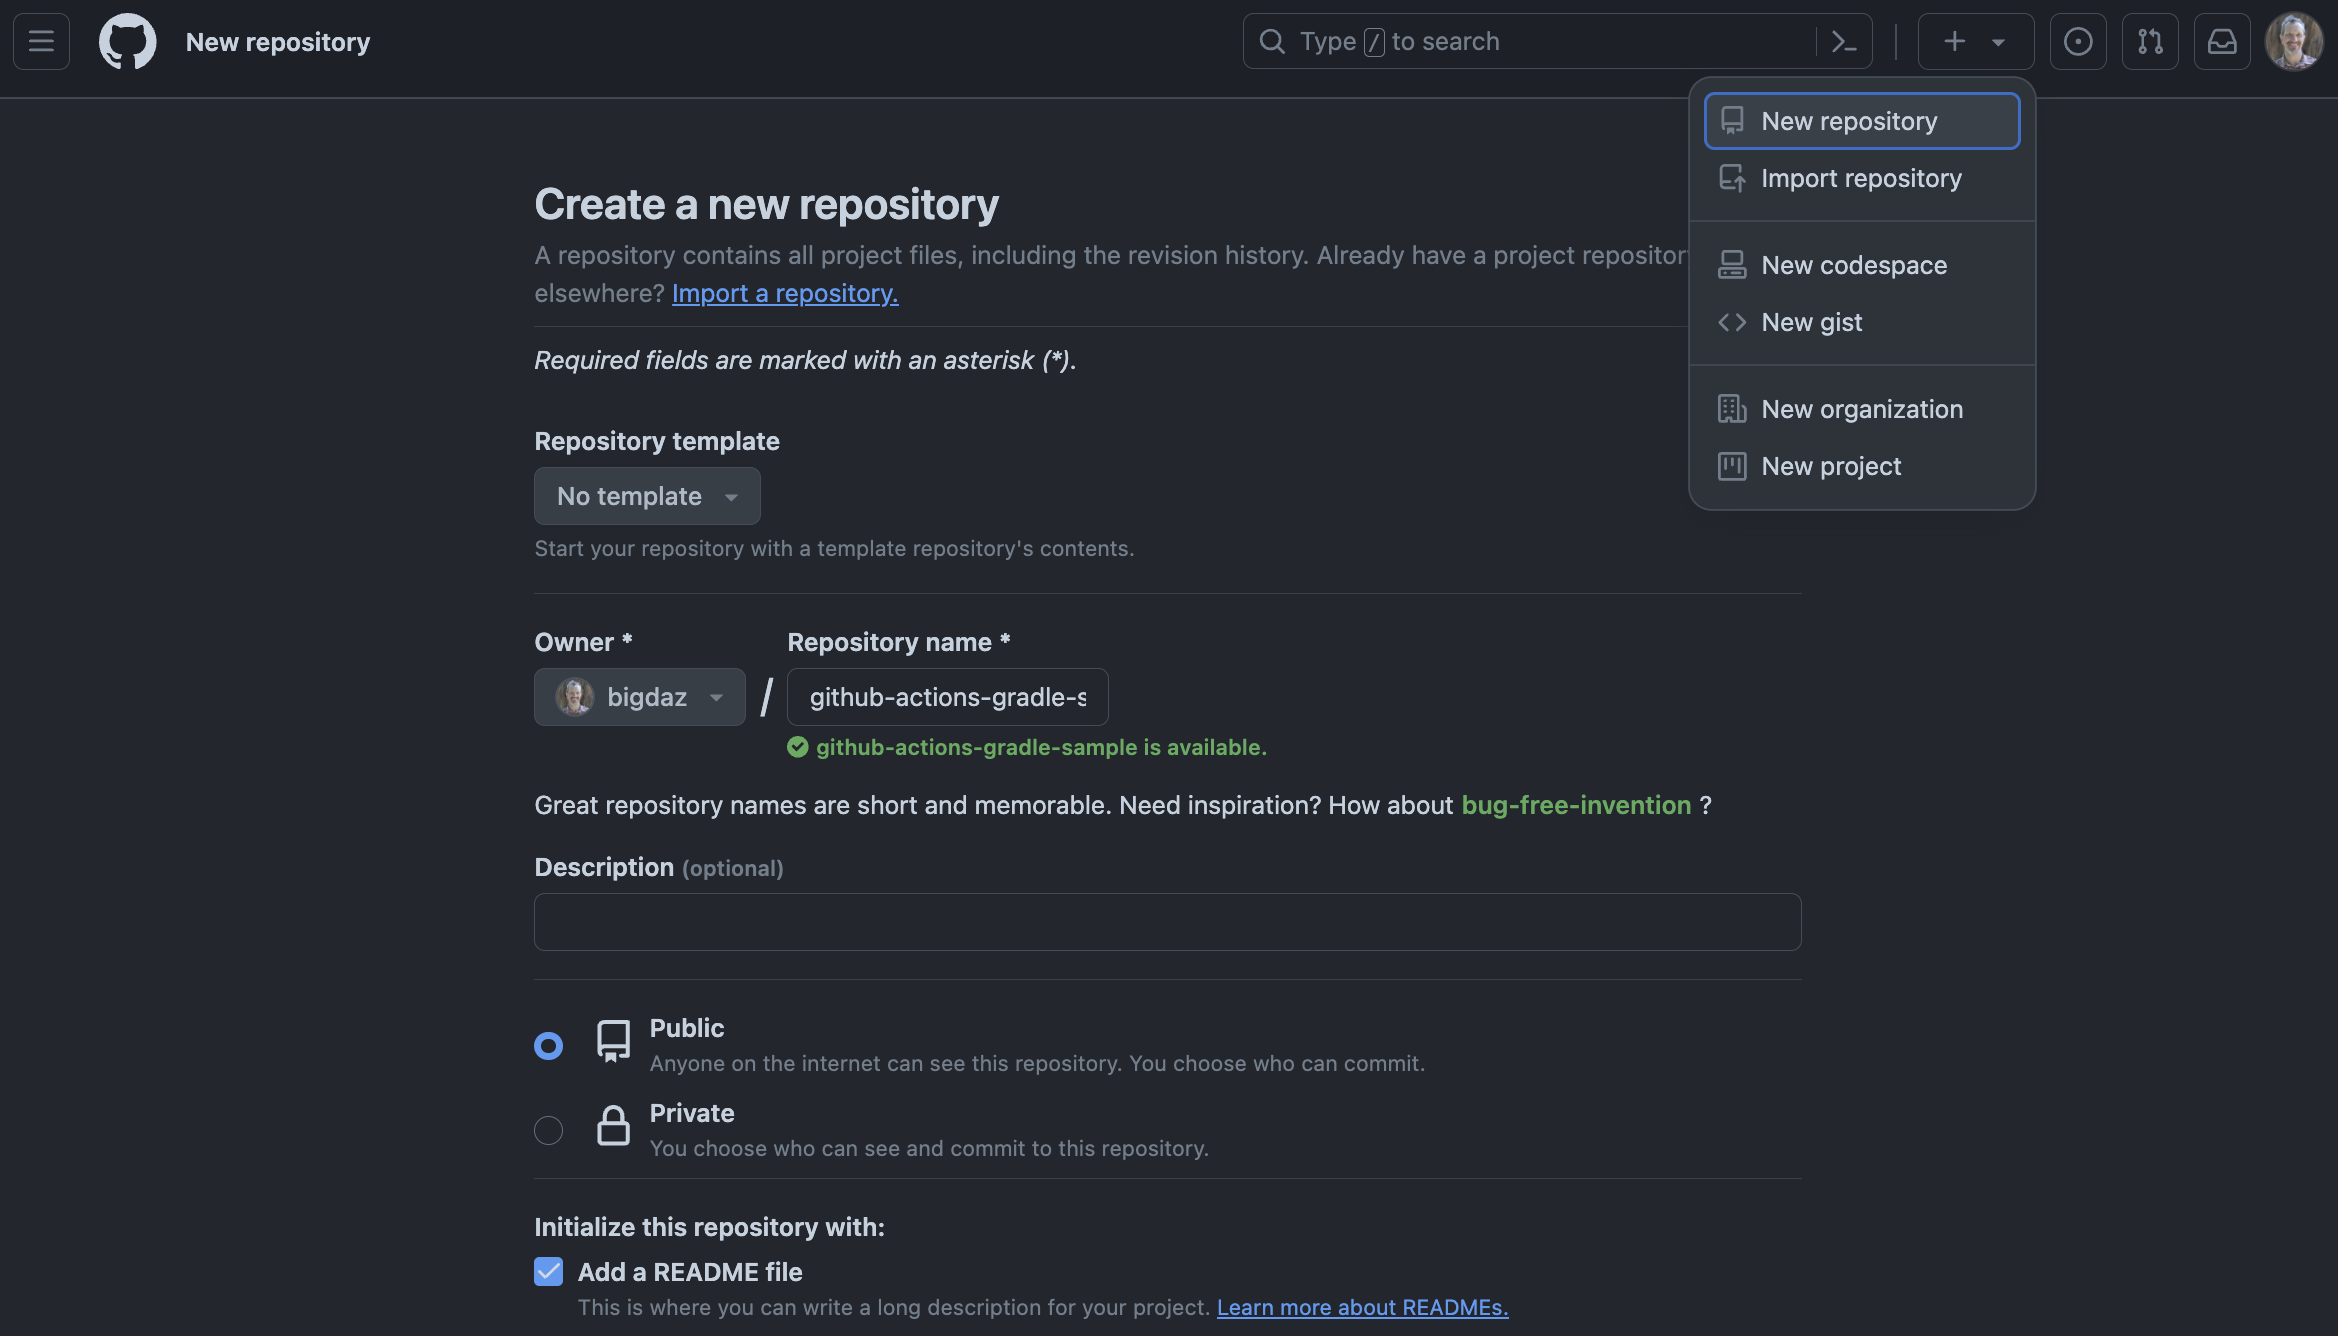
Create a new GitHub repository for your project
Via the GitHub user interface, create a new repository named github-actions-gradle-sample.
Clone the repository locally
$ git clone git@github.com:<YOUR-GITHUB-USER>/github-actions-gradle-sample.git
Cloning into 'github-actions-gradle-sample'...
$ cd github-actions-gradle-sample
Initialize the Gradle project and commit to the repository
Use gradle init to create a fresh Gradle project. You can choose any of the available options during init, but we recommend choosing "library" as the project type.
Once the project is generated, commit the changes and push to the repository.
$ gradle init
$ git add .
$ git commit -m "Initial commit"
$ git push
Test building the project
The project uses the Gradle Wrapper for building the project. It is a recommended practice for any Gradle project as it enables your project to built on CI without having to install the Gradle runtime.
Before asking GitHub Actions to build your project, it’s useful to ensure that it builds locally. Adding the "CI" environment variable will emulate running the build on GitHub Actions.
The following command achieves that:
$ CI=true ./gradlew build

BUILD SUCCESSFUL
If the build works as expected, we are ready to build it with GitHub Actions.
Configure GitHub Actions
You can create a GitHub Actions workflow by adding a .github/workflows/<workflow-name>.yml file to your repository.
This workflow definition file contains all relevant instructions for building the project on GitHub Actions.
The following workflow file instructs GitHub Actions to build your Gradle project using the Gradle Wrapper, executed by the default Java distribution for GitHub Actions.
Create a new file named .github/workflows/build-gradle-project.yml with the following content, and push it to the GitHub repository.
name: Build Gradle project

on:
  push:

jobs:
  build-gradle-project:
    runs-on: ubuntu-latest
    steps:
    - name: Checkout project sources
      uses: actions/checkout@v4

    - name: Setup Gradle
      uses: gradle/actions/setup-gradle@v3
      with:
        build-scan-publish: true
        build-scan-terms-of-use-url: "https://gradle.com/terms-of-service"
        build-scan-terms-of-use-agree: "yes"

    - name: Run build
      run: ./gradlew build
Gradle Build Scans® are a great way to view your build results, and provide valuable insights into your build. The workflow is configured to automatically publish a Build Scan for each build, accepting the legal terms of use. If you don’t wish to publish Build Scans, you can remove this configuration from the workflow.
Commit the changes and push to the repository:
$ git add .
$ git commit -m "Add GitHub Actions workflow"
$ git push
View the GitHub Actions results
Once this workflow file is pushed, you should immediately see the workflow execution in the GitHub Actions page for your repository (eg https://github.com/gradle/gradle/actions). Any subsequent push to the repository will trigger the workflow to run.
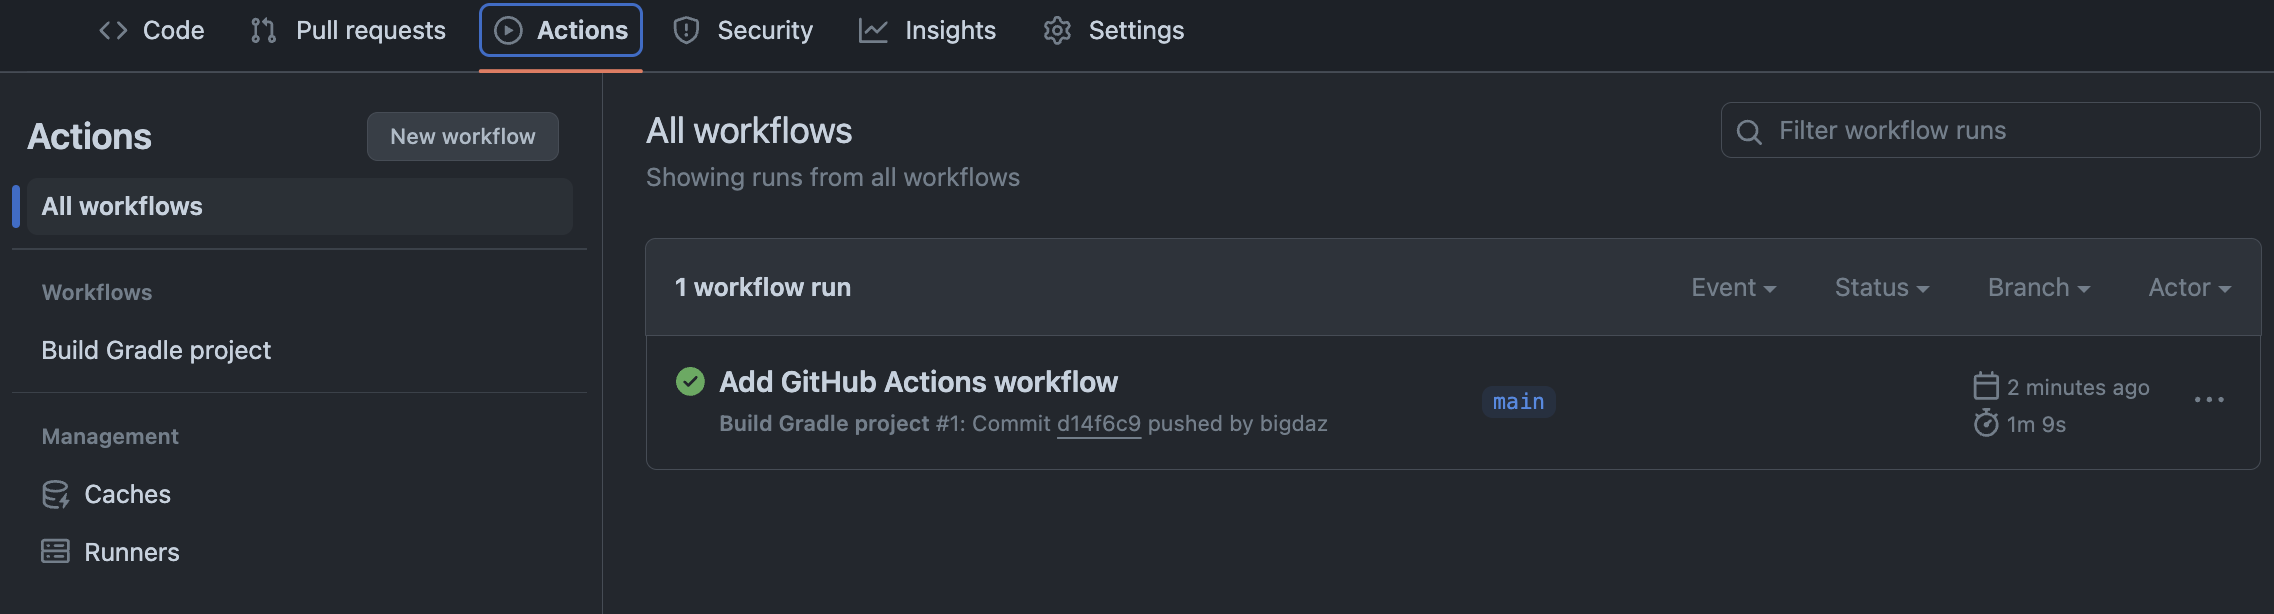
List all runs of the GitHub Actions workflow
The main actions page can be used to list all runs for a GitHub Actions workflow.
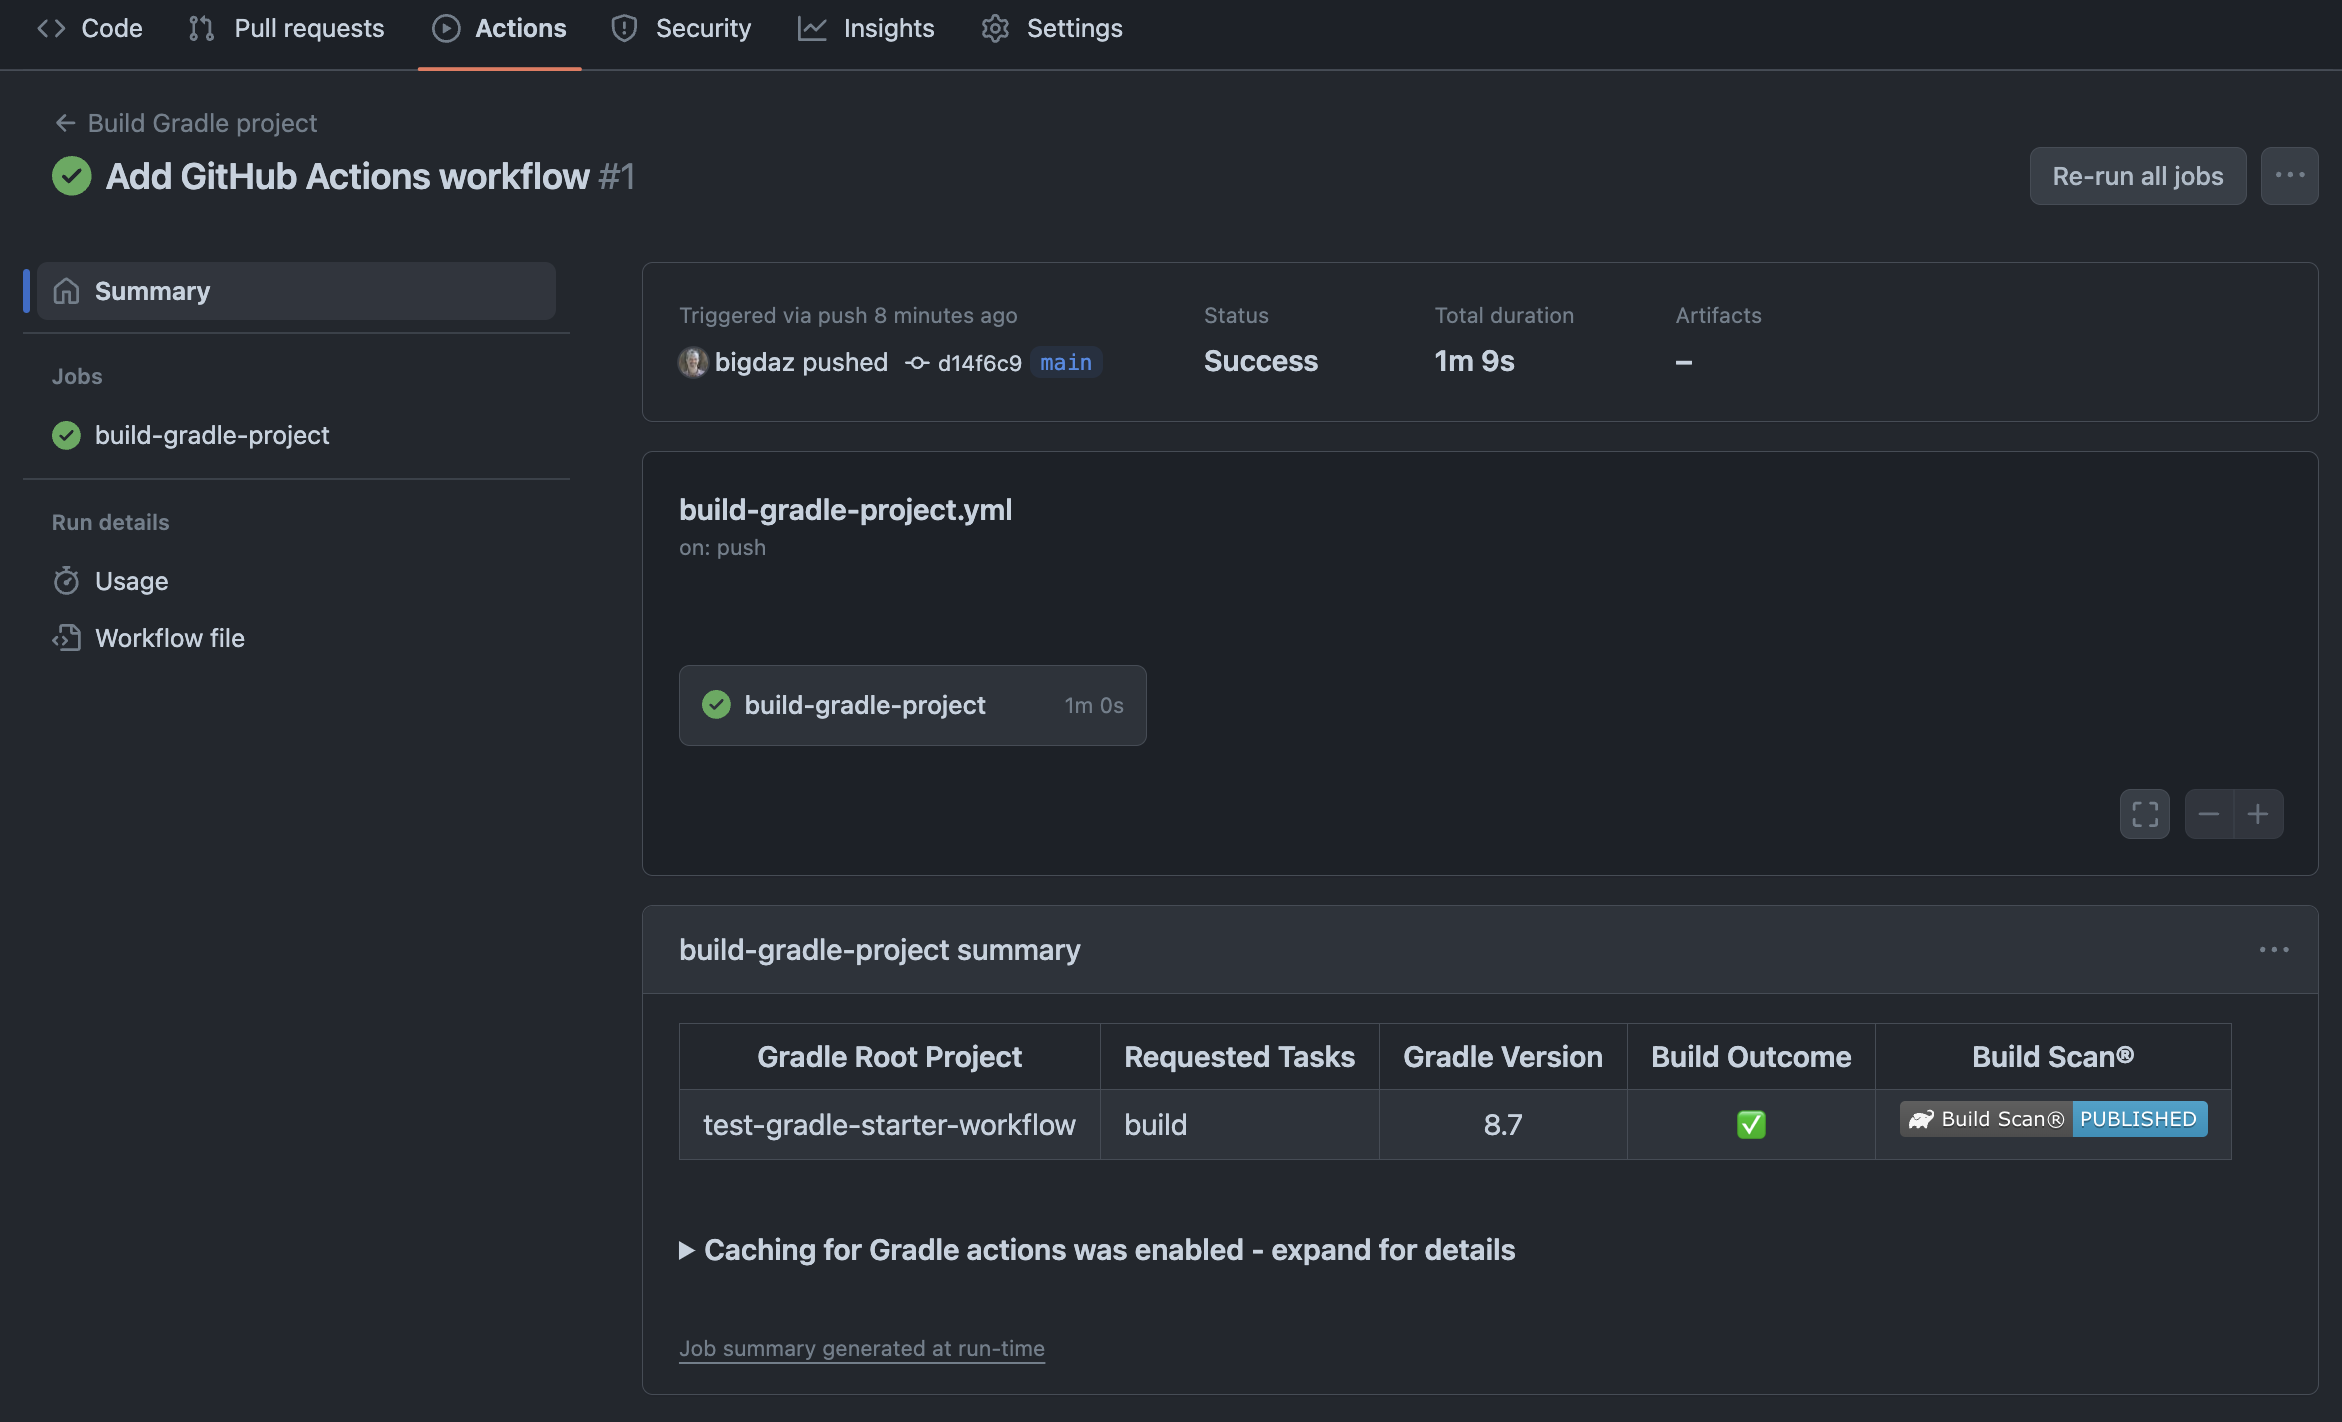
See the results for GitHub Actions workflow run
Clicking on the link for a workflow run will show the details of the workflow run, including a summary of all Gradle builds with links to any Build Scan published.
| Configuring build scans is especially helpful on cloud CI systems like GitHub Actions because it has additional environment and test results information that are difficult to obtain otherwise. |
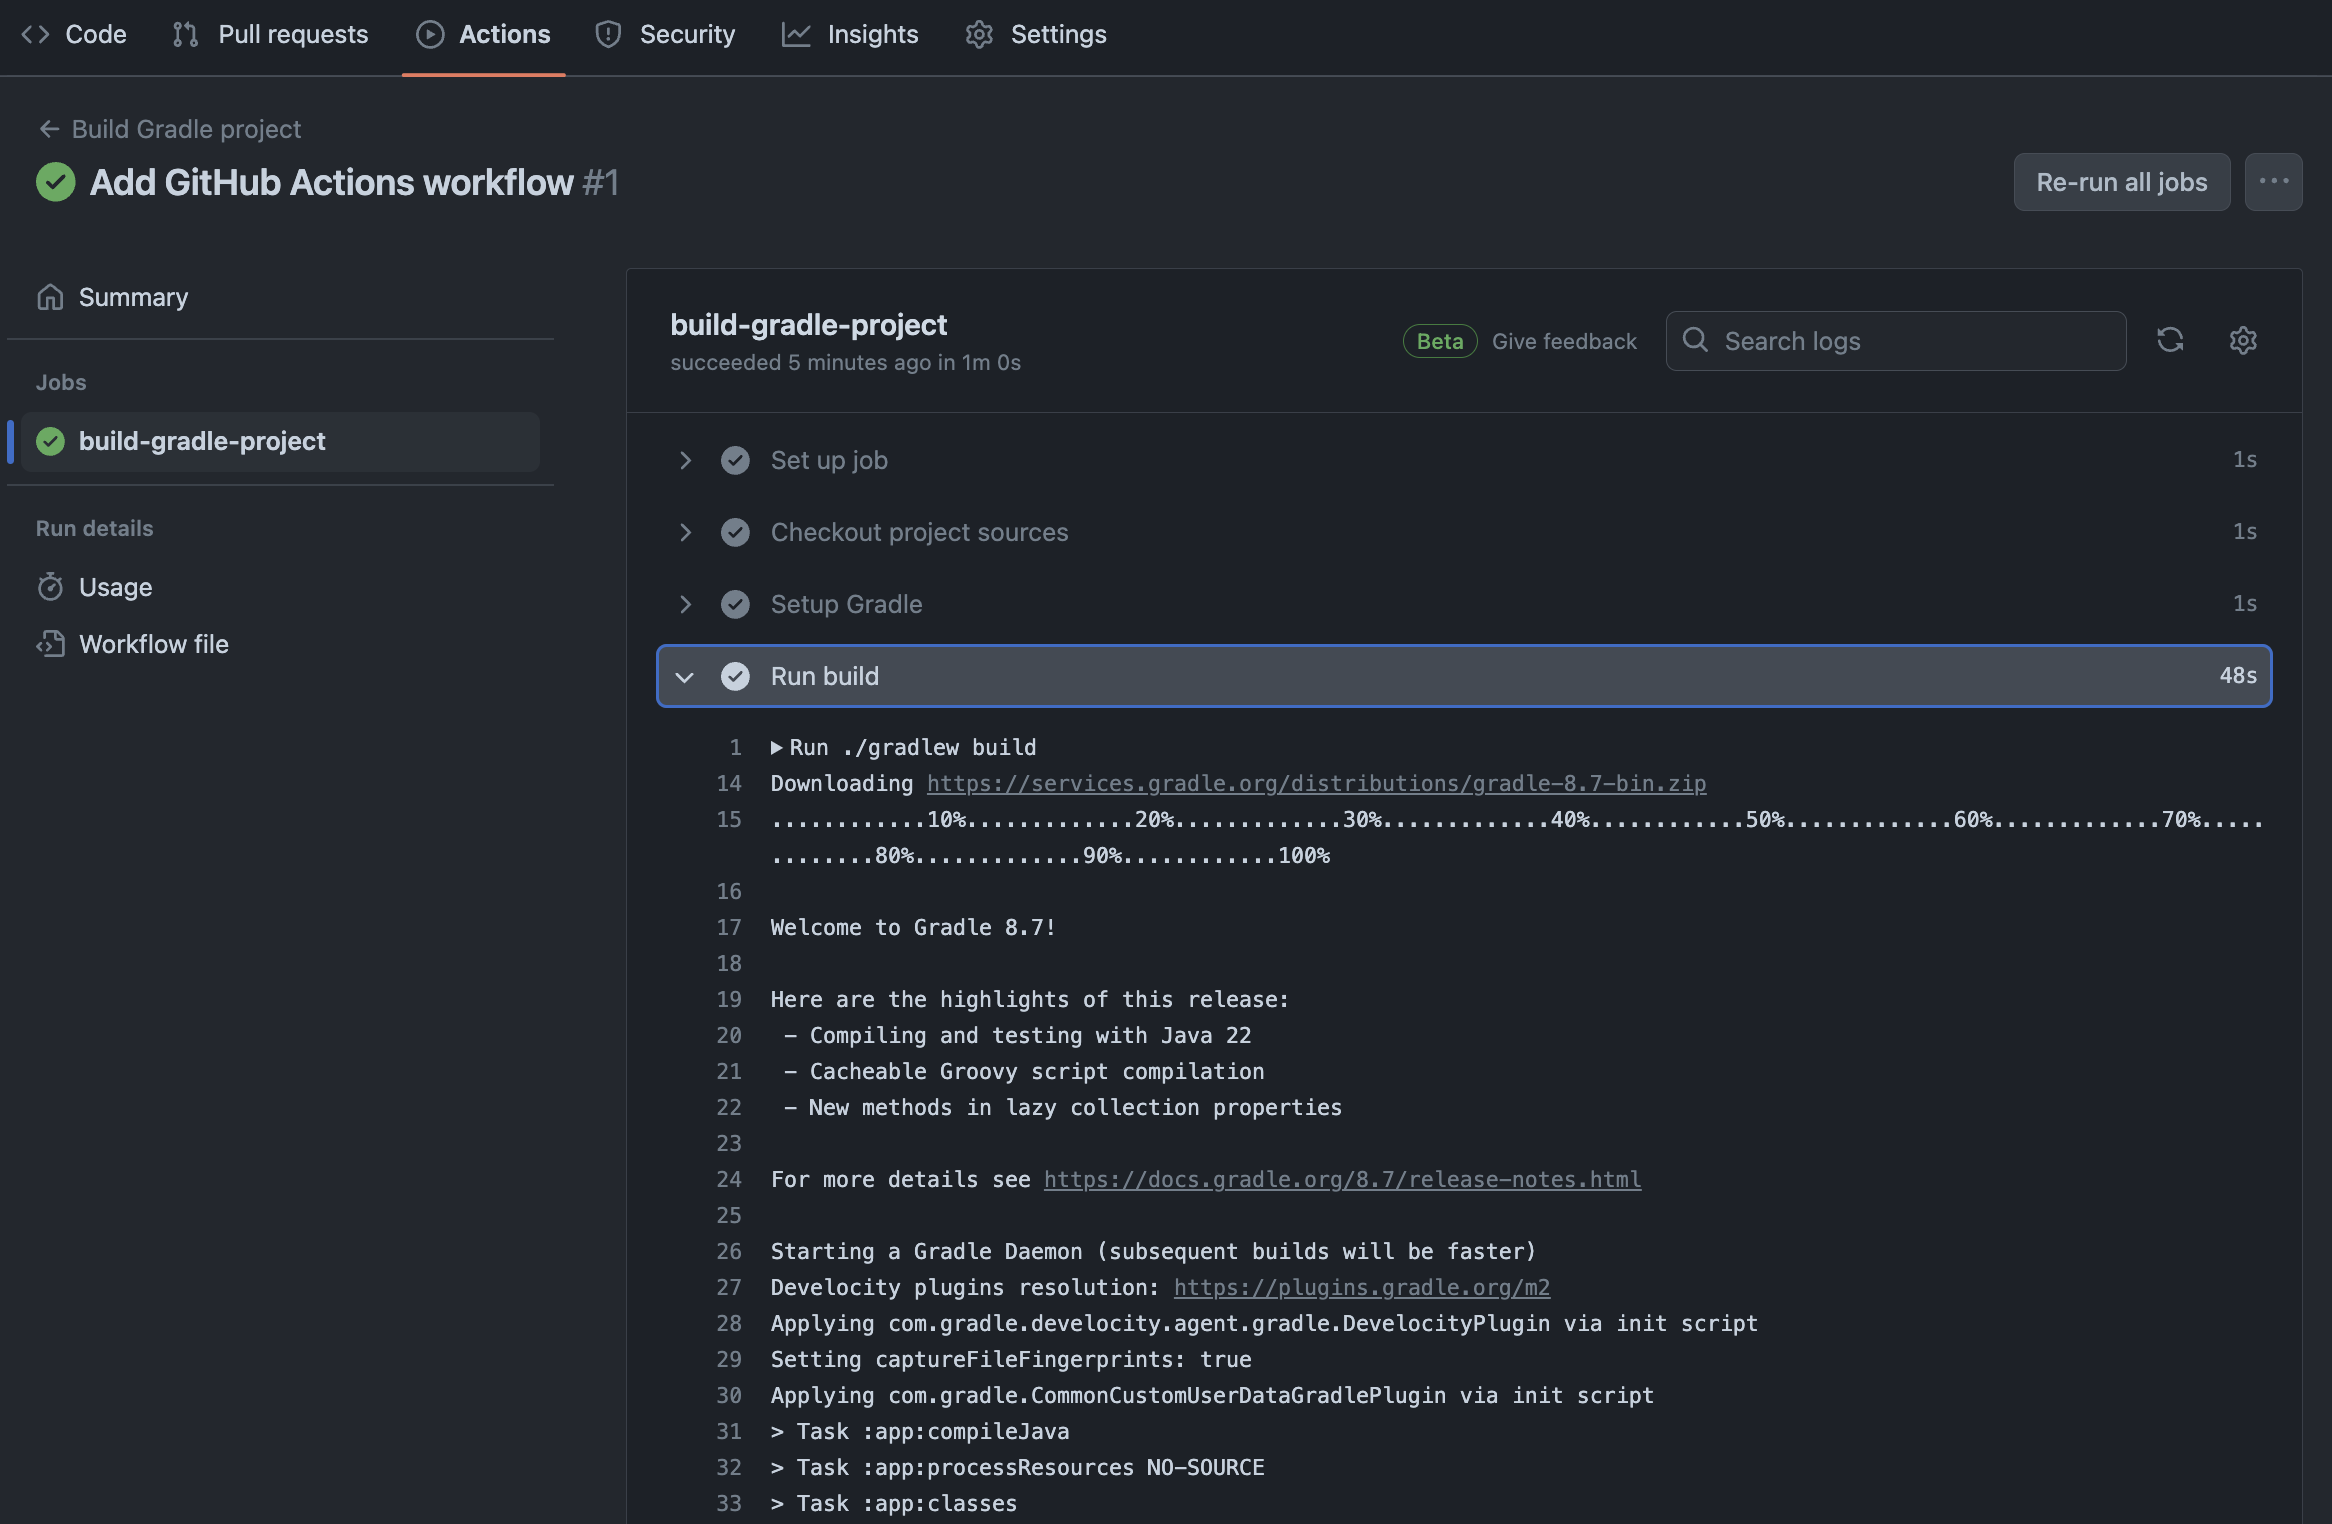
View the details for Jobs and Steps in the workflow
Finally, you can view the logs for the individual workflow Jobs and each Step defined for a Job:
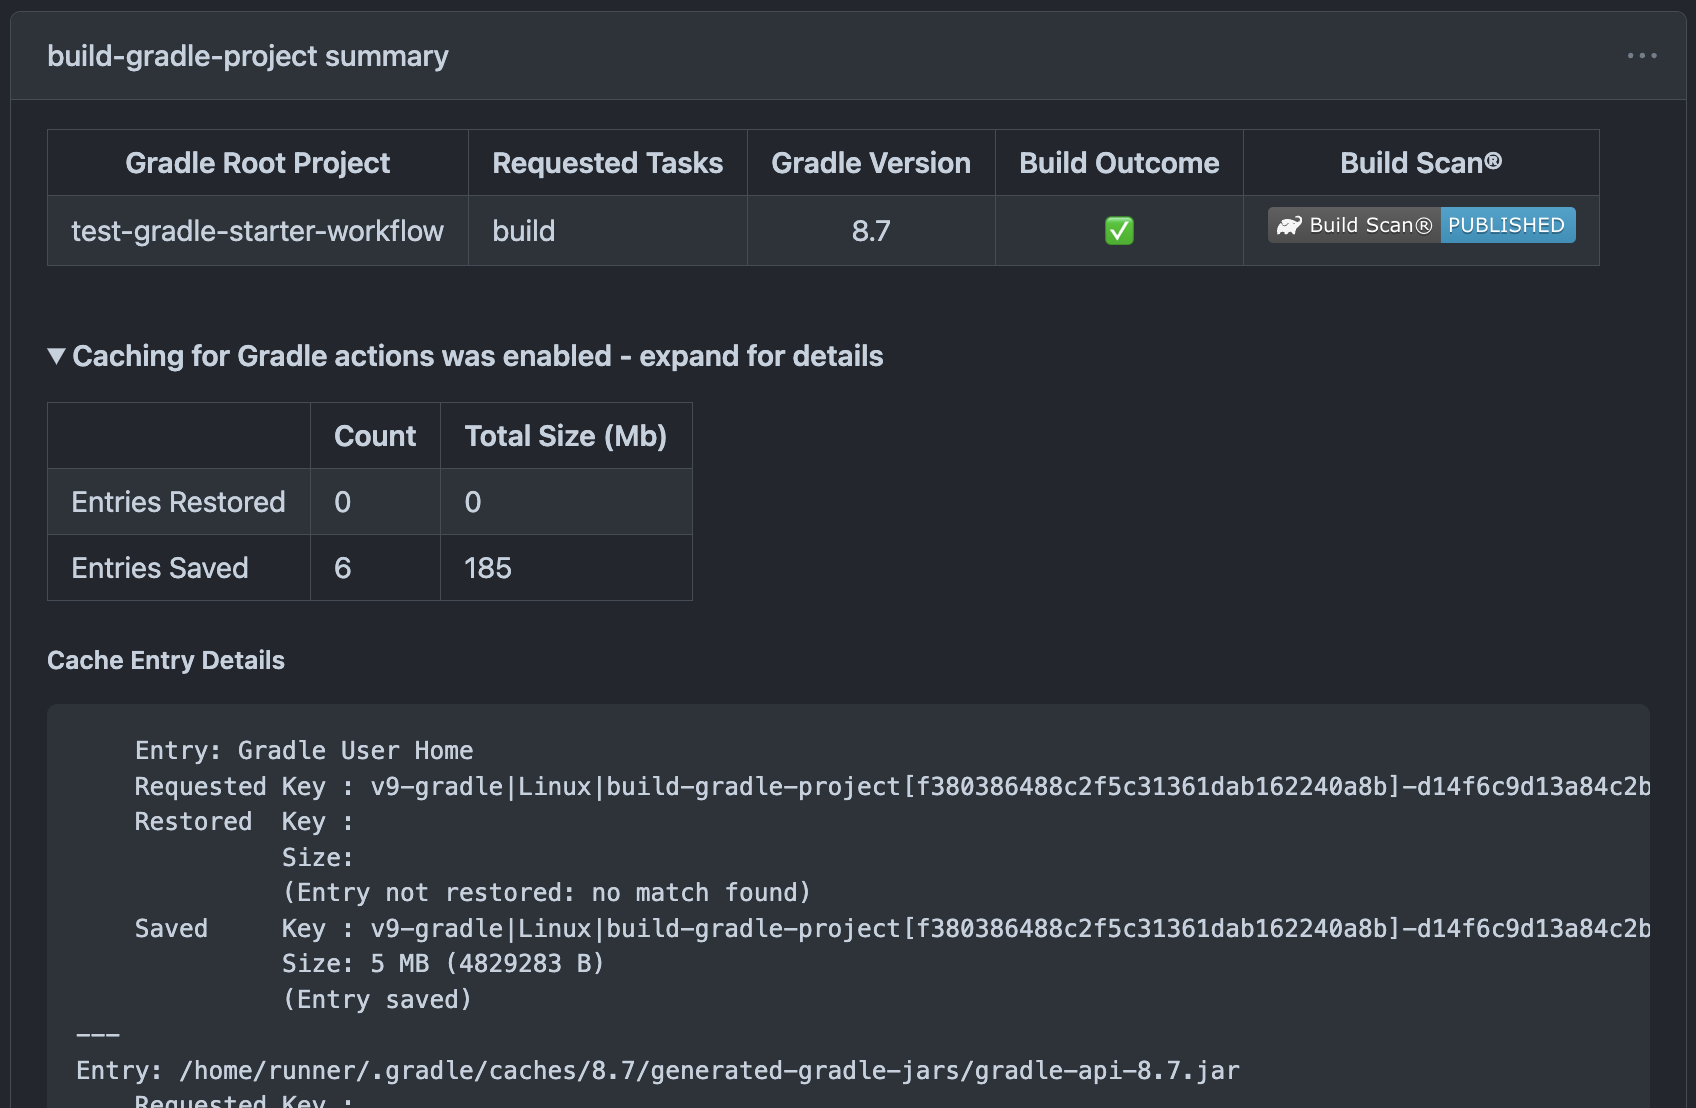
Enable caching of downloaded artifacts
The setup-gradle action used by this workflow will enable saving and restoring of the Gradle User Home directory in the built-in GitHub Actions cache. This will speed up your GitHub Actions build by avoiding the need to re-download Gradle versions and project dependencies, as well as re-using state from the previous workflow execution.
Details about what entries are saved/restored from the cache can be viewed in the generated Job Summary:
Detect vulnerable dependencies with a dependency-submission workflow
GitHub supply chain security features will detect and alert about any dependencies that have known vulnerabilities. In order to do this, GitHub requires a complete dependency graph for your project.
| Ensure that you have both Dependency graph and Dependabot alerts enabled for your repository. |
The dependency-submission action for Gradle provides the simplest way to generate a dependency graph for your project. This action will attempt to detect and upload a list of all dependencies used by your build.
We recommend a separate GitHub Actions workflow for dependency submission. Create a GitHub Actions workflow by adding a .github/workflows/<workflow-name>.yml file to your repository.
Create a new file named .github/workflows/gradle-dependency-submission.yml with the following content, and push it to the GitHub repository.
name: Gradle Dependency Submission

on:
  push:
    branches:
    - main

jobs:
  dependency-submission:
    runs-on: ubuntu-latest
    steps:
    - name: Checkout project sources
      uses: actions/checkout@v4

    - name: Generate and submit dependency graph
      uses: gradle/actions/dependency-submission@v3
      with:
        build-scan-publish: true
        build-scan-terms-of-use-url: "https://gradle.com/terms-of-service"
        build-scan-terms-of-use-agree: "yes"
Gradle Build Scans® are a great way to view your build results, and provide valuable insights into your build. The workflow is configured to automatically publish a Build Scan for each build, accepting the legal terms of use. If you don’t wish to publish Build Scans, you can remove this configuration from the workflow.
Commit the changes and push to the repository:
$ git add .
$ git commit -m "Add Dependency submission workflow"
$ git push
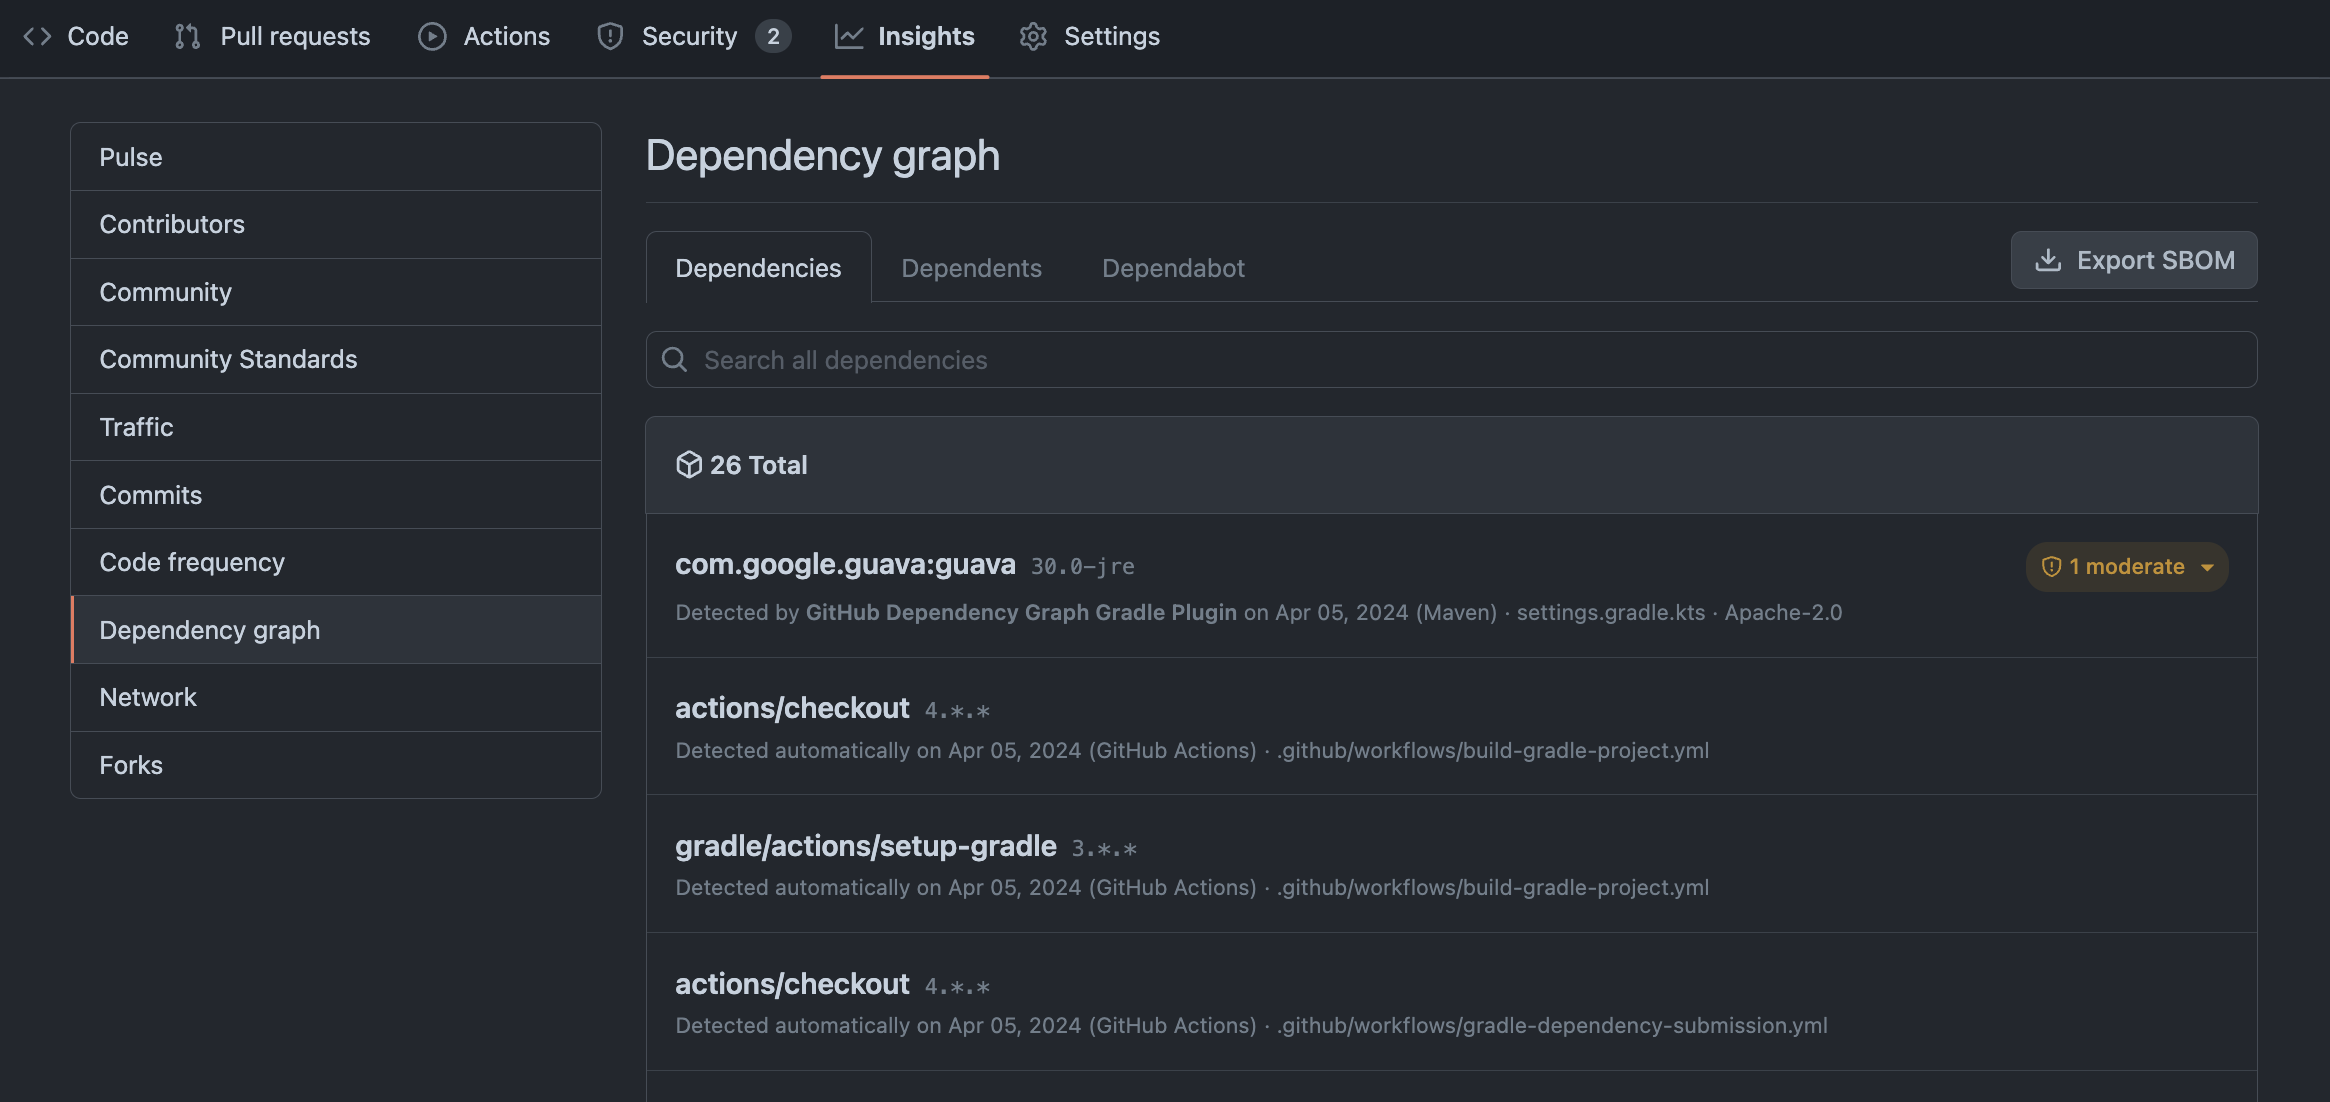
Viewing the dependency graph
Once the dependency-submission workflow has completed, you can view all reported dependencies by navigating to Insights → Dependency graph.
This image reveals that the repository contains a version of com.google.guava:guava with a moderate vulnerability.
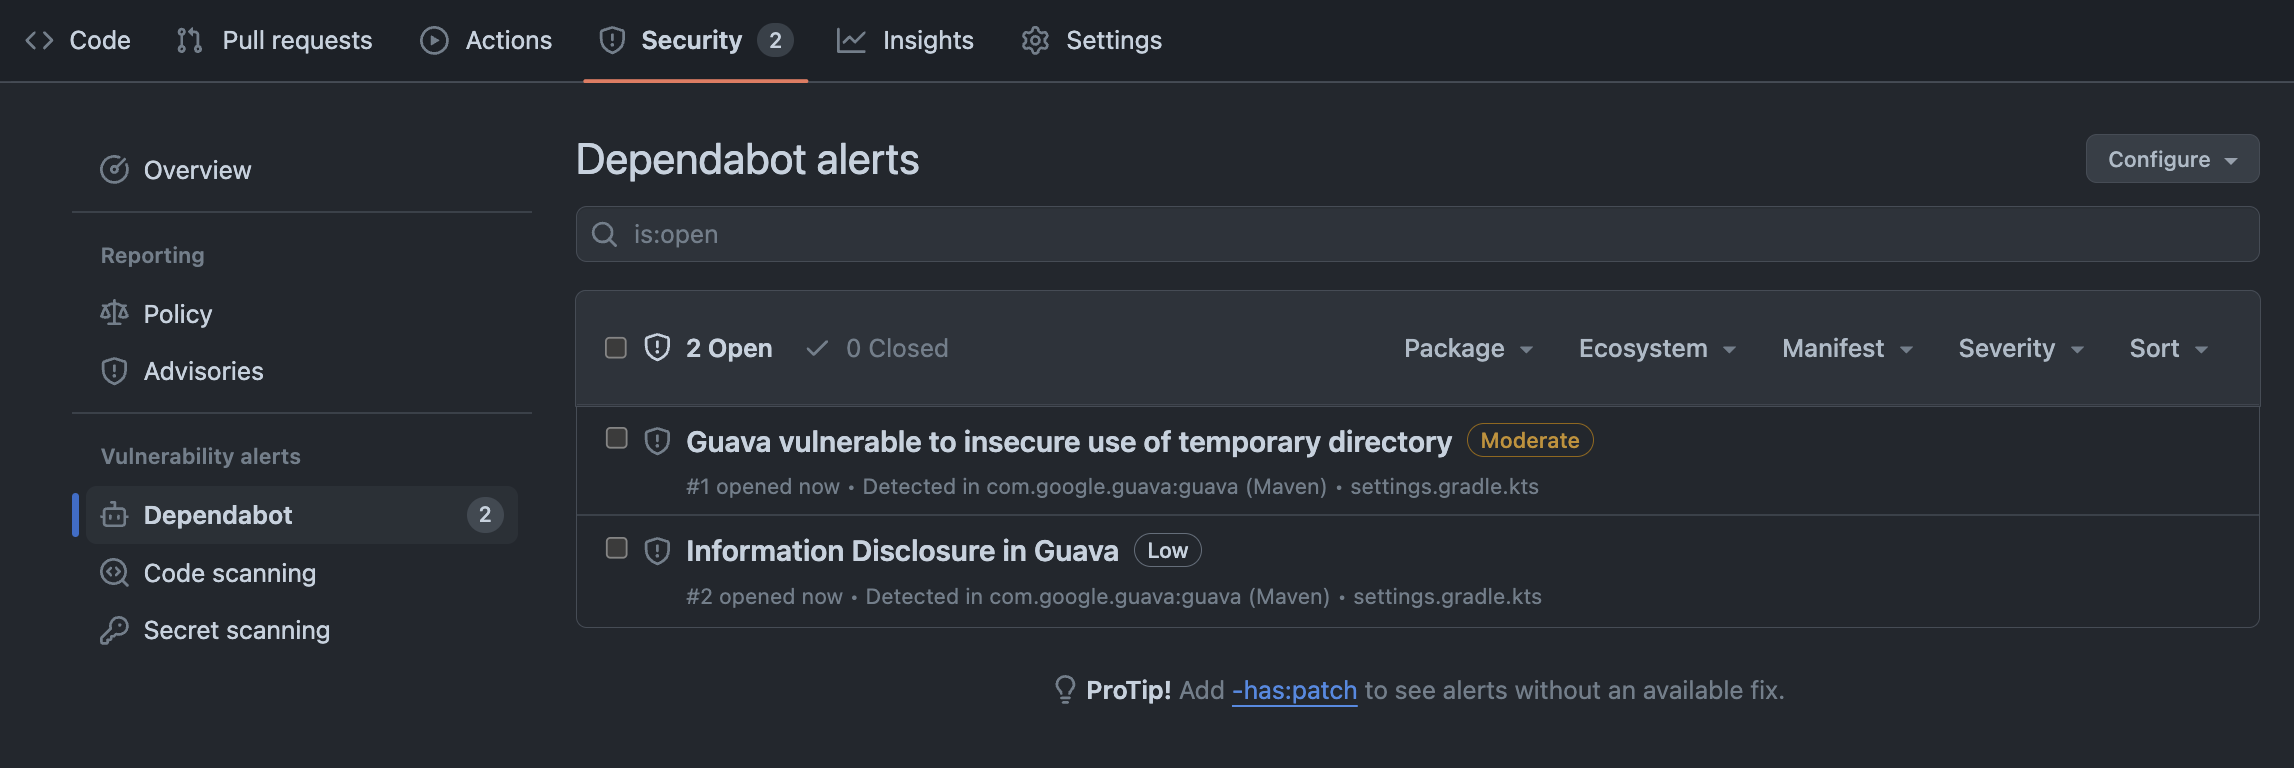
Viewing all dependency alerts
You can view a list of all vulnerabilities by navigating to Security → Dependabot.
Resolving dependency vulnerabilities
In some cases, resolving a vulnerability is as easy as updating a dependency declaration in your project. In other cases, when the dependency is transitive or is part of a plugin classpath, the solution is not so simple.
Please refer to the dependency-submission documentation, together with the github-dependency-submission-demo repository to learn more.
Further reading
Learn more about using GitHub Actions with your Gradle projects:
Summary
Executing Gradle builds on CI can be set up and configured with just a handful of steps. The benefit of receiving fast feedback clearly speaks for itself. GitHub Actions provides a simple, convenient mechanism to setup CI for any Gradle project hosted on GitHub.